
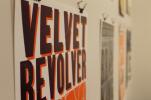
‘Cloths-Lined’ prints (center 3) from a one-day Hatch Show Print exhibit & talk.
PART ONE:
Cloths-lining, as it may seem, refers to hanging all 2-dimensional works at the same height, regardless of their size. I find this works best with unframed works and cloth pieces. You must be very careful with your unframed works–even with prints, you do not want to pierce the paper with pins, as they will always be evident. Rule of thumb with paper works: if it doesn’t belong to you, don’t pin it.
 For this particular show, we used binder clips with panel nails, see detail on right. This made the ‘cloths-line’ method quite easy.
SUGGESTED TOOLS: Laser Level, tall a-frame ladder, tape measure, masking tape, wood panel nails, small black binder clips.
SUGGESTED METHOD: Decide the arrangement of the works. Measure the works, and figure how much space to allow between the pieces. Using the A-frame ladder as a level prop, put your laser level at the desired height. Once it is on, use the masking tape to mark the measurements & spacing along the laser. With the laser level still on, mark & set your nails for each piece. Use the binder clips to hang the works on the nails, adjusting as needed to make level.
Moving the laser level up or down the ladder rungs can help in hanging multiple levels of smaller works. MEASURE the chosen display items first! I am lucky in having a large amount of floor space for sample lay-outs.
PART TWO:
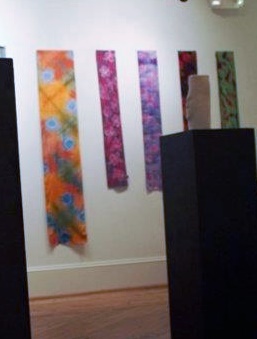
Cloth and silk pieces are also great items to ‘cloths-line’. I’ve “cloths-lined” this row of batik silk scarves by Macon, GA artist Wini McQueen. In order to hang these, we first measured the width of the scarf, plotted a trapezoid shape on foam core, cut the shapes with a straight edge & razor, and nailed the foam core to the wall. We then used straight pins to attach the work to the foam core. This did not damage the weave of the work, and made a lovely display that wafted with the movements of the crowd during the opening reception.
SUGGESTED TOOLS: Laser level, tape measure, a-frame ladder, small panel nails, foam core trapezoid shapes, level, straight pins. Optional for scarves: portable steamer.
You can use either a tape measure or laser level to set your height. Set laser level as mentioned above, using ladder to help with placement. Before hammering in the trapezoid shape*, level it, make sure it’s still in-line with the measurement or laser level line. I did the arrangement on the scarves based on color variations and width.

- The trapezoid foam core shape (far right) before attaching silk scarf.
Consider “cloths-lining” the next time you have a paper, print, or scarf show–it can make for a very interesting display, and the more interesting and interactive the display, the more sellable the work becomes!
Be sure to check out our Nashville buddies, Hatch Show Print. Jim Sherraden is a delightful person, and was a joy to work with. We hung the show in just a few hours, had a presentation and reception, then took the show down again. I cannot stress how important the laser level was in setting this show. Without an intern and knowledgeable co-worker, I could not have achieved hanging this show on my own.
*Ms. Wakefield carries a level with her at all times, and has been known to straighten pictures at Wendy’s.
