Hanging Oil Paintings that are not dry?!? A Pictorial Tutorial.

This has happened, several times, during my tenure as curator. No one likes it, because of the obvious issues involved in hanging wet work–they can get smudged, smooshed, and lead to smears across the wall.

One, you must be very careful in handling the piece (duh!). The best advice, of course, is to leave it out of the show. However, if you must add it, then you must, and I’ve created one way to hang it without wet paint marring the wall.
Note: these pictures are in b&w to hide the identity of the artist.

Step One: Identify the problem area.

Is it just the front? The sides? Or does the paint overlap the sides and continue onto the back?

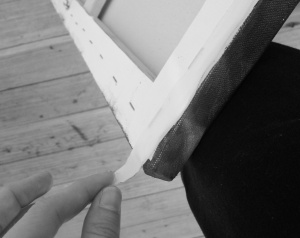
Here, I’ve identified the problem area on the back
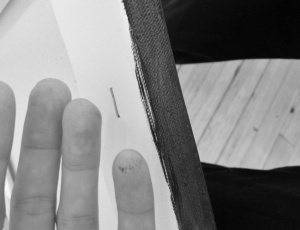
Very technical method here. Be sure to wash hands thoroughly before 'testing' other areas.

…as seen by using this highly technical method. (I recommend only using this method for the back of the painting–NEVER for the front)
Be sure to wash hands thoroughly before identifying other problem areas.

Step Two: ‘Fixing’ the Problem
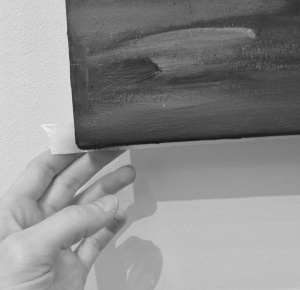
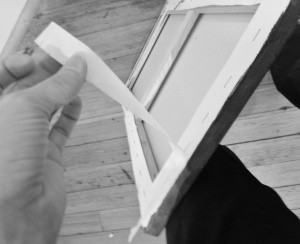
To fix the problem, I’ve used masking tape (painters tape will work). Lightly apply the tape along the edge of the wet painting. Obviously, the bottom portion of the painting was the issue–the top was dry.

Masking Tape Fix


Be sure to leave a ‘tab’ of masking tape on each side.

Tab is more than a soda.

Step Three: Now You’re Ready to Hang

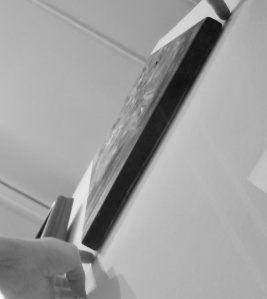
Now the work can lay safely against the wall without repainting the space behind it. Using the tabs, you can slide the work to center it.

Place the work on the wallCenter the work using tabs

Step Four: DON’T FORGET TO REMOVE THE TAPE!

Here, I’ve attached a useful note to myself to remove the tape before the opening. When removing tape, just pull straight down from the tabs with slow, steady pressure.

Note to Self...

*Ms. Wakefield almost never delivers wet paintings to shows…
Trapezoid Foam Core Hanger Pictorial Tutorial

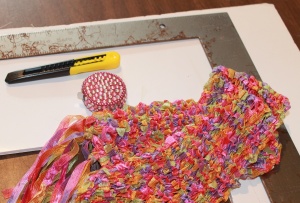
Foam Core, Tape Measure, Box Cutter, Straight Ruler, Art Piece

The Tools: Foam Core, Tape Measure, Box Cutter, Straight Ruler, Art Piece

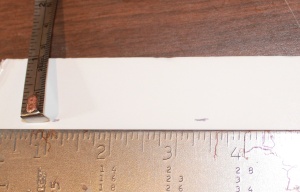
To Start: Measure the piece. This one measures 5 inches wide. Thanks to Courtney the intern for assisting in this tutorial.

Remember to do two marks (at one inch, here) for the length of the hanger. This is for cutting a straight line.

Mark Measurements on Foam Core: Remember to do two marks (at one inch, here) for the length of the hanger. This is for cutting a straight line.

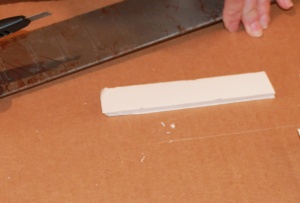
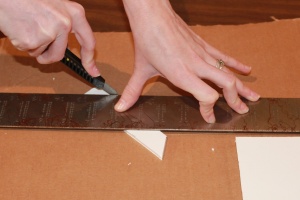
Line up the ruler with the two measurement marks. Hold ruler down firmly. Make several passes with the razor blade for a cleaner cut. Hold the razor at an inward angle for a cleaner cut as well. MAKE sure your razor blade is NOT upside down, or you could injure yourself!

Same method on smaller cut.

Done with step one.

Done with step one.

7

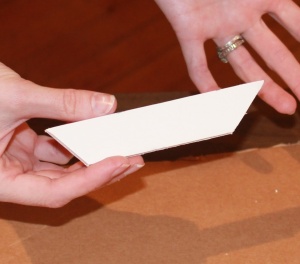
Cutting Diagonals: Cut one side, then the next. DOUBLE CHECK that your angles are going in the same direction!

8

Done!

Now to Hanging! Tools: Trapezoid shape, small panel nails, straight pins, level, hammer.

Place shape where required, hammer in first nail. Level shape before putting in second nail. If secure on the wall, it should only move slightly on wall to level. It should not be too loose OR too tight; the foam core should not have deep creases from the nail being in too tight.

Hammer in second panel nail.

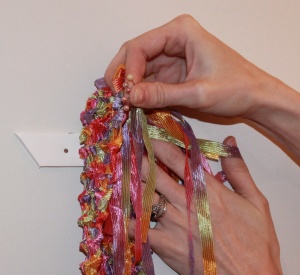
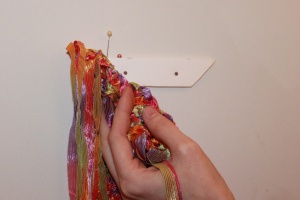
Line up scarf with top ledge of hanger. Use straight pins to attach.

Now to Hanging: Line up scarf with top ledge of hanger. Use straight pins to attach.

I use foam core because there is the foam center to secure the straight pins without bending them. The more pressure used to apply straight pins, the easier it could be to damage the fabric.

I use foam core because of the soft foam center. This secures the straight pins without bending them. The more pressure used to insert straight pins (for instance, if you used a matte board), the higher chances of damaging the fabric.

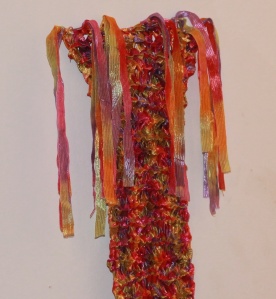
Not a piece I would choose to hang on the wall, but it was handy for the demonstration!

Not a piece I would choose to hang on the wall, but it was handy for the demonstration!

*But Ms. Wakefield, when would I USE such a technique

Suggested Tools for the Curator

Things in my personal tool box:

A tool belt–absolutely necessary when hanging a show!  Plus, you feel boss walking around in it.

Hammer–goes without saying.*

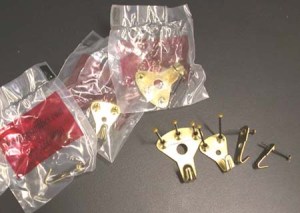
Three sizes of hangers & nails

Nails of various sizes–I have three different sized nails for the various sized work.  I also have sets of picture hangers; the single nail set usually does fine for most hangings, but if the piece is overly large and heavy, I recommend two three-nail hangers. *

Sandpaper and fast drying drywall–of course, this depends on your wall.  Ours is a matte finish, with “sheep’s wool” benjamin moore paint.  The sandpaper and drywall are to, of course, fill in the holes left by nails.

Yellow Chalk–useful for marking where the nail will go.  Wipes off easily, and a light coat of paint will cover it’s mark better than a pencil mark.*

Masking Tape–I use this to mark the spacing between 2-d works.  Comes off easily without marring the wall.*

Tape Measure–Also, goes without saying.  I have three tape measurers in the gallery–one that lives in my tool belt, one that lives in my tool box, and one that lives on the desk for customers’ use.  Customers use tape measurers to personally measure pieces they are interested in purchasing.*

These are your enemy.

These are your enemy.

Picture Wire and Eyelet Hooks–not every artist understands how necessary it is to properly wire their canvas works.  You can hang a canvas on two evenly hung nails, but wire adds security to the piece, especially if you have busy receptions.  Nothing worse than a painting “jumping” off the wall in a crowded room.  **

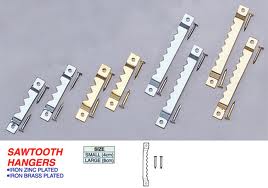
–Pieces that have sawtooth hangers are NOTORIOUS for “jumping off” walls, particularly if you’re hanging another piece next to them.  If your artist absolutely cannot do without this evil device, then do all your placement & measurements for the pieces, and REMOVE the work before hammering next to it.  You don’t want to damage someone’s work or someone else’s future investment!

Level–Absolutely necessary.  Level the work after it’s hung, BEFORE setting the next piece; an unlevel painting can throw off your measurements by a couple of inches, which makes for a visually unsettling display.  Level after hanging each piece, before measuring for the next piece, and re-level after getting everything hung.*

OTHER NEEDED ITEMS: Three different ladders–the step ladder, the six footer a-frame, and the 10 footer a-frame ladder.  Additional bulbs for your light fixtures, soft cloth (I use rags made from an old sweat shirt)*, windex, paper towels, and lint rollers.  A screwdriver–I have one that is both phillips & flat head in one.  Screws of various sizes.  Electric drill (luxury item!).  Push pins, and binder clips.  A razor blade and straight edge are important as well.  We have a hand truck (luxury item!) for heavy sculptures and for easily moving pedestals.

*Denotes items suggested for tool belts.

**Tutorial on wiring canvas coming soon.

*Ms. Wakefield admits levels are often her impulse purchase of choice.  She cannot tell you how many pocket levels she owns.

Cloths-Line Hanging Method

'Cloths-Lined' prints (center 3) from a one-day Hatch Show Print exhibit & talk.

‘Cloths-Lined’ prints (center 3) from a one-day Hatch Show Print exhibit & talk.

PART ONE:

Cloths-lining, as it may seem, refers to hanging all 2-dimensional works at the same height, regardless of their size.  I find this works best with unframed works and cloth pieces.  You must be very careful with your unframed works–even with prints, you do not want to pierce the paper with pins, as they will always be evident.  Rule of thumb with paper works: if it doesn’t belong to you, don’t pin it.

Detail of Hanging MethodFor this particular show, we used binder clips with panel nails, see detail on right.  This made the ‘cloths-line’ method quite easy.  

SUGGESTED TOOLS: Laser Level, tall a-frame ladder, tape measure, masking tape,  wood panel nails, small black binder clips.

SUGGESTED METHOD: Decide the arrangement of the works.  Measure the works, and figure how much space to allow between the pieces.  Using the A-frame ladder as a level prop, put your laser level at the desired height.  Once it is on, use the masking tape to mark the measurements & spacing along the laser.  With the laser level still on, mark & set your nails for each piece.  Use the binder clips to hang the works on the nails, adjusting as needed to make level.

Moving the laser level up or down the ladder rungs can help in hanging multiple levels of smaller works.  MEASURE the chosen display items first!  I am lucky in having a large amount of floor space for sample lay-outs.

PART TWO:

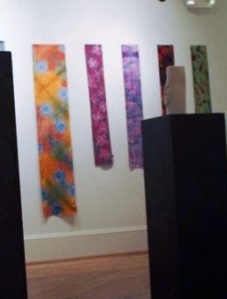
Row of silk scarves

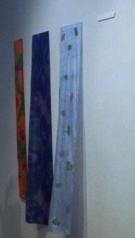
Cloth and silk pieces are also great items to ‘cloths-line’.  I’ve “cloths-lined” this row of batik silk scarves by Macon, GA artist Wini McQueen.  In order to hang these, we first measured the width of the scarf, plotted a trapezoid shape on foam core, cut the shapes with a straight edge & razor, and nailed the foam core to the wall.  We then used straight pins to attach the work to the foam core.  This did not damage the weave of the work, and made a lovely display that wafted with the movements of the crowd during the opening reception.  

SUGGESTED TOOLS: Laser level, tape measure, a-frame ladder, small panel nails, foam core trapezoid shapes, level, straight pins.  Optional for scarves: portable steamer.

You can use either a tape measure or laser level to set your height.  Set laser level as mentioned above, using ladder to help with placement.  Before hammering in the trapezoid shape*, level it, make sure it’s still in-line with the measurement or laser level line.  I did the arrangement on the scarves based on color variations and width.

The trapezoid foam core shape (far right) before attaching silk scarf.

Consider “cloths-lining” the next time you have a paper, print, or scarf show–it can make for a very interesting display, and the more interesting and interactive the display, the more sellable the work becomes!


Be sure to check out our Nashville buddies, Hatch Show Print.  Jim Sherraden is a delightful person, and was a joy to work with.  We hung the show in just a few hours, had a presentation and reception, then took the show down again.  I cannot stress how important the laser level was in setting this show.  Without an intern and knowledgeable co-worker, I could not have achieved hanging this show on my own.

*Ms. Wakefield carries a level with her at all times, and has been known to straighten pictures at Wendy’s.

Ledging–Useful for Large Paintings

Work by Atlanta artist Jeff Surace

Work by Atlanta artist Jeff Surace

Ledging, a term for the technique of hanging paintings of differing sizes as if they were resting on a ledge, is very useful for large vertically oriented paintings. In this particular show, the tallest painting, on the left, was about 6 feet in height   The advantage of ledging these paintings meant we had space for the additional aesthetic of  “Element”, which was also the title of the show.  We used a local sign store, and I worked with the marketing coordinator on color & wording.  The local sign store installed the vinyl lettering, which easily peeled off once the show was done.

SUGGESTED TOOLS: Tape measure, masking tape, large nails OR three-nail hangers.  Masking tape, level, step-ladder.

SUGGESTED METHOD: Decide placement of work, and in-between spacing.  Set the largest piece first, at a height appropriate for the wall and your audience.  Once you’ve set and leveled the largest piece, measure up from the base of the floor to the bottom of the painting; mark this with masking tape for the next piece.  Mark the measurements for the next piece using masking tape, and measure the amount of space from the top of the painting to the height of the wire–this is where your nail will be.  Set your nail in the wall within the measurements of the piece, and set your piece.  Level, double-check the height in relation to the first piece, and adjust if necessary.

Continue with following pieces.  If you’re using a vinyl sign, as shown, take measurements of the space for your or your marketer’s use in developing the sign.  I recommend using local businesses, as they will professionally install the product and, in our case, have a quick turn-around.

*Check out more of Jeff Surace’s work.

*Ms. Wakefield is the beyonce of curators with her ability to make up descriptive terms.